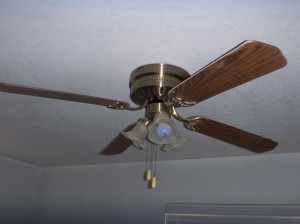
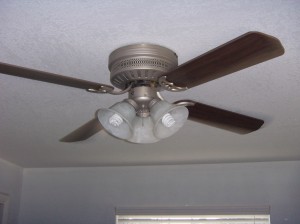
The ceiling fans in all of the bedrooms leave a little something to be desired. They function, but are noisy and ugly, and they are getting a makeover, one by one. Here is what I started with in the guest bedroom:
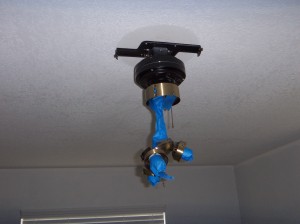
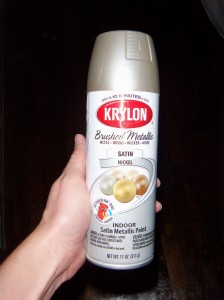
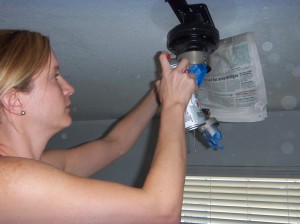
Blech. Old, ugly, and creaky. I started by removing the glass bulb covers, and disassembling the fan as much as possible, cleaning everything as I went. I used blue tape to cover everything I did not want to get spray paint on (wires, sockets, etc.), and then I attacked it with Krylon Brushed Metallic spray paint in satin nickel.
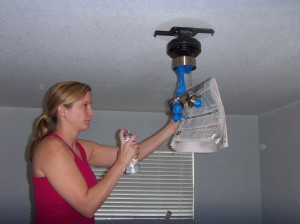
We had moved the bed to the center of the room and covered it with plastic to prep for painting the walls, so everything was protected, and the bed was perfect to stand on. I held up newspaper behind my spray stream to catch as much excess as possible.
The trick is to give it several light coats, with drying time in between. If you spray too much at once it will run and drip. I suffer from lack of patience, so this is hard for me, but with lots of trial and error and dripping spray paint, I have realized this is necessary and resigned myself to this method. It works.
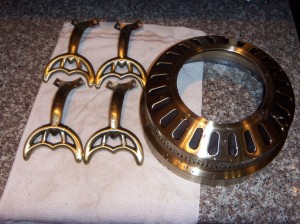
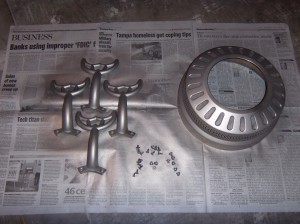
I gave the same treatment to the pieces I had taken off:
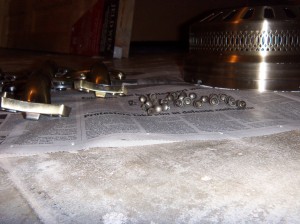
This second shot is to show you that I also spray painted all of the screws, and I did this by setting all of them on their sides facing one direction. It is slightly time-consuming, but then you can spray them all at once.
Once everything was dried, I put it all back together. I discovered that the reverse side of the fan blades were a much darker brown, and I did not have to spray paint them at all, but simply attached them with the other side facing down. I am not sure if most fan blades are reversible, or if I just got lucky, but it was a happy surprise.
Other than spray paint, the only thing I purchased for this project was new bulb covers. I saw ones I liked at Home Depot, but for $8 each, I didn’t buy them. I wanted this makeover to be as cheap as possible, and this price deeply offended me, so I decided to shop around.
We went to our local Habitat for Humanity ReStore to browse one morning. I absolutely love this place. They take donations from individuals, businesses, builders, etc., and sell building supplies very cheap. The proceeds go towards building Habitat homes. I have been to many ReStores in Florida, learned that they are all very different, and discovered that we are lucky to have such a large, clean, and organized one with very helpful employees so close to us. While shopping there, I found the EXACT SAME bulb covers for $4.00 each. Once we got them to the register, they rang up at $2.00 each. $2.00 each!! I got all three for less than the price of one at Home Depot. Score!
Here is the fan transformation, with the “before” picture for comparison:
Another great consequence of taking the fan apart, and putting it back together, is that everything got tightened up, and it is very quiet again. No more old, creaking fan. To my friends and family who have slept in this room, and probably will again: you are welcome!!
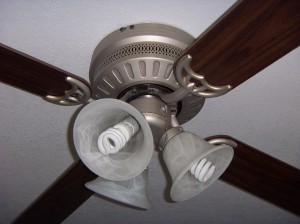
Gratuitous close up, because I love this fan so much now:
Total cost: $6.00 (for the new bulb covers. I already had the spray paint, and used maybe 1/3 of it for this project, but if you have to purchase some, it is $6-7 a can).

Your fan renovation looks so great!! I just saw your link on Pretty Handy Girl, where I saw her fan restoration because she commented on mine! Haha must be the season 😉 But mine was a little more expensive because I bought a new light for ours – I don’t like how the compact fluorescent ones look – who knew you can buy a ceiling fan light kit!? But I also like your new globes!! They totally update the fan, and what a lucky coincidence about the fan blades!
Oh yah here is mine: http://house-capades.blogspot.com/2012/09/ceiling-fan-restoration.html
Thanks, Callie! I can’t wait to check out your blog … and I’ve heard of the ceiling fan light kits but never tried one. I have two more fans to redo so I will definitely check it out!
Ah yes!!!!! It is possible!!!!!! We have ugly dated fans all over the house and I have found my self wondering how I can possibly spray paint all that brass without messing up wires and such. Will be taping the crap out of it like you did! Glad to see that it works. And clearly I need to find a Habitat for Humanity ReStore near me