Pinbusters – Homemade Biore Strips

Have you ever wondered if the stuff people post on Pinterest is true? Well I have, and I test them all so that you don’t have to, ’cause ain’t nobody got time for that.  Click here to check out all of the pins I haven taken on. You might be surprised by some of the results!

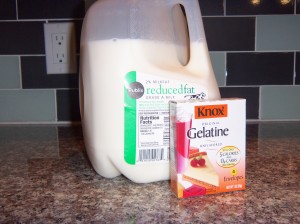
This Pin claims that you can make a facial mask from gelatin and milk, that when peeled off, works like a Biore strip.  The first step is buying unflavored gelatin.  I don’t know about you, but I had NO idea this product existed.  It opens up a whole new world of jello (shot) possibilities!  So even if this miraculously cheap faux-Biore doesn’t work, at least I have that.

Here is where you can find said unflavored gelatin – hanging out with his flavored friends:

Psst! I’m up here! Top left!

Can you see that price?  $1.49 per package, so I bought two just in case.  Not for homemade Jello shots, Mom!  (OMG imagine the flavor possibilities.  I am going to use Crystal Light packages – sugar free Jello shots!!!  Update:  The Boy pointed at that sugar-free Jello already exists.  Hmmm.  Good point.)

I gathered my ingredients, and it cannot get much simpler:

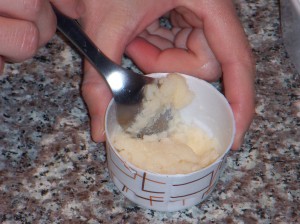
The instructions say to use a disposable container, so I cut off the top half of a cup.  When I opened the box – surprise! – there are four separate pouches of gelatin in there, and with two boxes, we now have quite a surplus of unflavored gelatin.  One pouch is one tablespoon, so you actually don’t need to measure it.  I mixed in 1.5 tablespoons of milk (why not water?) until I achieved this chunky paste, which happened really quickly:

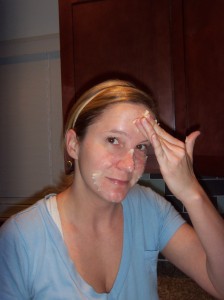
I then, um, squished it all over my face.

Do I look pretty yet?

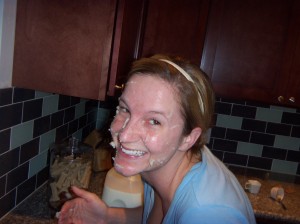
It doesn’t necessarily “spread” like a lotion, so I quickly moved over to the sink to catch the falling gelatin chunks.  The Boy was having quite a good laugh at my expense as he played photographer.  If nothing else, it was funny:

How about now?

I am currently sitting on the couch typing this and in the time it has taken (17 minutes), my face feels like it might shatter.  It certainly feels like a Biore strip on my entire face, despite the large hilarious chunks.  Here goes nothing.

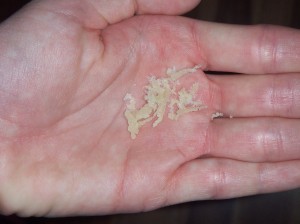
WOW.  Well.  I am not sure where to begin.  First, ouch.  It hurts, but you can’t rip it off all at once like a real strip.  Instead, it comes off in infuriatingly small chunks. One. Chunk. At. A. Time. Hypothetically, IF you could get a good portion to peel off all at once, you MIGHT have the desired effect.  Instead, I picked and peeled for 8.5 minutes and ended up with this:

and this:

When I finally gave up, after giving it the good old college try, I went to wash it off.  The gelatin laughed at water.  It scoffed at my face soap.  I finally had to get a washcloth, soak it with hot water, and SCRUB my face.  More ouch.

I can’t decide if there was something wrong with my recipe and technique, or if the blogger who wrote that post is laughing hysterically and cheers-ing her girlfriends while they revel in the fantastic trick they just pulled on all of the Pin-iverse.  Update:  I just peeled a chunk off the back of my hand and my t-shirt.

Review:  It you rub gelatin all over your face, you will end up with nothing but shame, disappointment, a red face, and if you are lucky, a Dirty dog that licks the leftover gelatin off while a Boy makes you pizza rolls to cheer you up.  There is a very good reason why Biore has the corner on this market.  Don’t ever question it again.  Cut coupons for your Biore strips and be grateful that they exist.  Or have clogged pores!! Really either option is better than what I just endured.  I fully expect to wake up tomorrow morning broken out in a facial rash due to a previously unknown allergy to gelatin.  That would be just my luck.

(I want to go back and change the title of this post to “Ouch, Ouch, You’re on My Face,” but I worry that would be a spoiler.)

This PIN is SO BUSTED, but at least I can experiment with Jello shots.  And for that I thank you, Bill Cosby.

(P.S. I attempted this a second time, with a slightly different technique here – check it out!)

You Probably Think This Post is About You

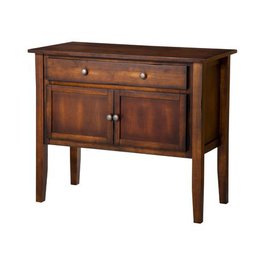
Howdy folks. This post is about vanity, but less of the staring longingly into the mirror kind, and more about what is sitting under that mirror. As part of the bathroom renovation process, I want to tell you how to convert a buffet or dresser into a vanity that will not only look great, but be functional. I searched for many moons to find the right “vanity” that would fit in our small bathroom, and it was no easy task. However, since most vanities cost several big face hundos (that is a few hundred dollars to those not in the “rap game”), I bought a tiny used buffet on Craigslist for $50, and it is something I highly recommend for renovating on a budget. The woman who sold it to me told me said that she had purchased it at a very fancy French boutique called Target (pronounced “Tar-jey,” with a soft “j,” like “jogging”), therefore I was able to find this “before” picture of it straight from the source:

The key to finding the right piece to fit in your bathroom is taking all dimensions into consideration. For example, we already had the glass vessel sink we would be using, therefore we needed the length and width to fit in the area, but we also needed the right height. After placing the vessel sink on many unsuspecting furniture victims in our house, and pretending to wash our hands, brush our teeth, etc., we were able to figure out a good height for the vanity, which was no taller than 30″ high. This baby just barely made the cut, and with its square-ish legs, we figured we could trim an inch off each one if we absolutely had to. (For those wondering, this gal didn’t get a name since I knew from the get-go that she would be staying with the house when we sell it at some point in the future.)

We laid solid teak flooring in the bathroom, and had a decent amount left over, so our plan was to paint the vanity white and create a new top for it with the leftover teak. Therefore, we broke it down into pieces, which was very difficult, and required The Boy’s expertise, since it was the type that every piece held the other parts on with those locking screws. If you have ever assembled Ikea furniture you will know what I mean! Imagine doing that task backwards with sweat dripping off your nose. I apologize to the screwdriver that briefly took flight. Once disassembled, we realized that building a new top would be very difficult, and would have to mirror the existing one precisely, to allow reassembly (holes in the spots, same width and depth, etc.).

First I sanded every piece with a rough grit sandpaper (nothing crazy, I believe it was 100 grit) to get through the gloss coat and allow primer to adhere. Then I primed each piece twice, and applied two coats of flat paint. This process took a small amount of work, but a lot of time due to allowing for drying in between each coat. After many brainstorming sessions about building the new teak top, and procrastinating, we were down to the wire to get this thing in place before my 30th birthday pool party. Thank goodness my brilliant and lovely friend Jessica again saved the day (see here where she helped us build a fence!). She witnessed the “how the heck are we gonna do this” conversation, and said, “Why don’t you just glue the teak to the existing top, and then put it all back together?” Well color me an idiot. I love that girl. Like I said, brilliant.

I quickly primed and painted the edges of the old top, since they would be visible. We had already built the new top by glueing each piece of teak to each other and clamping while they dried. We adhered the teak board to the old top using wood glue and a few screws going up from the bottom side (so that they were not visible from the top). The Boy is a fanatic about pre-drilling holes (i.e. drilling a small hole for the screw to go into), but I give him credit because it really does prevent the wood from splitting, which would have been disastrous.

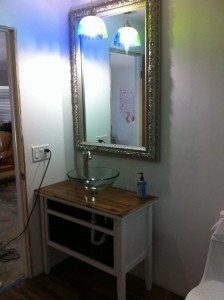
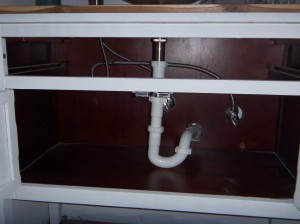
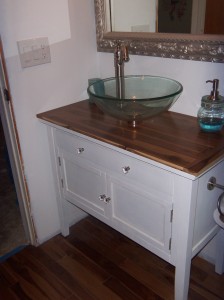
The Boy cut the necessary hole in the top for the vessel sink, and in the back of the vanity to accommodate for plumbing. I do not have any pictures of this process, so I cannot give a how-to tutorial, but we will be doing it again for our master bathroom, so I promise that an in-depth plumbing post is forthcoming. Here is the vanity in place, with the plumbing complete:

We left the doors and drawers off while we did that work, for obvious reasons. The most difficult part was altering the drawer to fit around the pipes, but even that wasn’t so difficult.

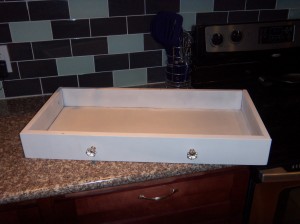
Here is the drawer (you will see that I found cute glass pulls at Home Depot for the doors and drawers):

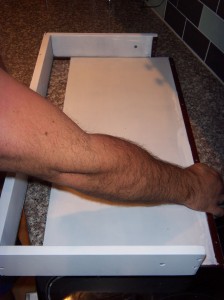
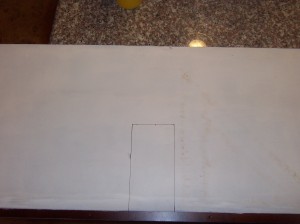
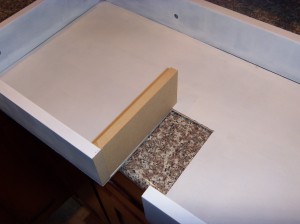
Next we removed the screws holding the back of the drawer on, and slid out the bottom. We measured how far back from the front of the vanity the pipe was, so we could measure from the front of the drawer and draw a mark on the bottom. We also knew that the pipe was in the middle of the vanity, so we gave generous room for the pipe’s width as well.

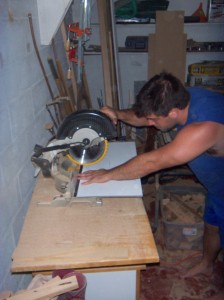
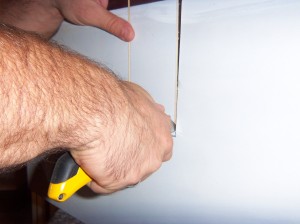
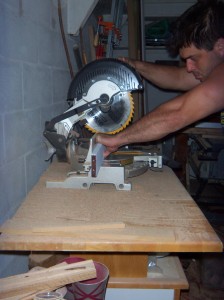
From there we cut on the long sides with our miter saw, but it couldn’t quite cut far enough, so we just scored the rest of the line, and the one going across, and snapped off the piece:

We also had to cut the back of the drawer, and for this we also used the miter saw:

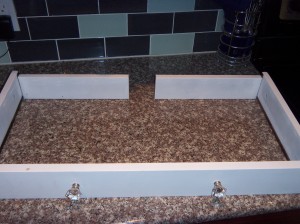
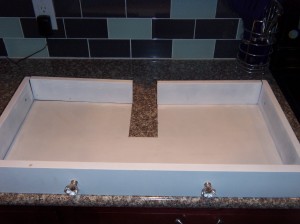
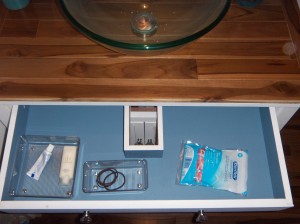
Once we had this we started to reassemble. Luckily we had some leftover MDF (medium density fiberboard) which was the same width as the outside pieces of the drawer, so we cut that into pieces to make side walls for the cut out portion.

We screwed the back pieces into place, and attached the MDF using wood glue and a finishing nail gun. Finally, I painted the inside of the drawer with a small amount of paint we had leftover, so it matches the accent wall in the bathroom. We attached the doors and slid the drawer into place. Voila!

So there you have it!! We have a few finishing touches to put on the bathroom, such as a new door (it is hollow core, and off the main living area, so we want a solid core door for a little more privacy), trim around door, baseboards, quarter-round around the tub … and then we can cross it off the list as officially DONE.

(If you are wondering what is in the sink in this last picture, it is a remnant from some Pinbusting work that I did!)

Psst – I entered this post in a contest hosted by East Coast Creative – check it out!)
Pinbusters – In Hot Water

Have you ever wondered if the stuff people post on Pinterest is true? Well I have, and I test them all so that you don’t have to, ’cause ain’t nobody got time for that.  Click here to check out all of the pins I haven taken on. You might be surprised by some of the results!

Surely everyone has seen the Pin – “to avoid a pot from boiling over, just put a wooden spoon on top!”  I was cooking pasta the other night, and decided to try it.  I’ll be darned if it didn’t work like a charm!

A charm.

I let that baby boil for several minutes, even got ballsy enough to leave the room, and it never boiled over.  While I am amazed, and pleasantly surprised, I MUST KNOW WHY!!!!  The very best explanation I found is located here:

http://boiledpizza.blogspot.com/2010/03/bps-science-boiling-water-and-wooden.html

Pretty cool, huh?