Move. That. Drain!!!!

Did anyone else picture Ty Pennington and 18,000 of his closest friends screaming at a bus driver?  Well picture me whispering it into The Boy’s ear.  Every day.  For a month-ish.

The Boy showed you his controlled demo skills in this post, but that was just the beginning of the months-long bathroom drama.  I would like to point out that during this bathroom renovation, we only had one bathroom.  For two adults.  (First world problems, I know.)  However, building the fence while waiting on granite to arrive and thus prior to destroying the bathroom turned out to be a fabulous idea, so that the neighbors didn’t see The Boy (or The Girl!) relieving themselves in the backyard.  I am not saying it did happen.  But I am not saying it didn’t, either.  I was cursed with a tiny bladder.  Nothing motivates a woman more than squatting in her own backyard.

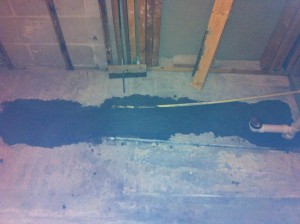
But I digress.  The first major obstacle we encountered was moving the shower drain, which is why we jack-hammered through our concrete slab and into the earth below. We had to dig deep enough to find the p-trap and move everything over a few feet.  You can see where the drain was located in this photo:

That is the drain on the far left.

The one thing we actually considered, but could not figure out how to avoid, was accidentally hitting one of water supply lines which we knew were buried in the cement. However, we could only guess at their exact location, so we braced ourselves for the potential disaster.  We should be palm readers:

That is what copper pipe looks like once you have pierced a rather large hole in it.  The Boy screamed, “water, water, water!” or something equally descriptive, and I ran outside as fast as I could to turn off the water main.  Luckily, there was no flood, and everything dried in a few hours.  Here is how it looked after we fixed the busted pipe:

Yikes.

Since we were converting the former shower into a tub, we needed to move that drain a few feet to the right, to precisely the spot where the water supply line in the top of the picture is located.  The Boy moved the supply line to give us room, which was fairly straight-forward.  I did learn the difference between working with copper, pvc, and cpvc piping.  Obviously copper you have to solder, which we were not up for.  Therefore, we replaced the copper with pvc, which is pretty easy once you have all the tools you will need (pipe cutter, cleaner, glue).  I did not realize that the “glue” is actually a chemical that causes a reaction, basically melting the two pipes together.  Therefore, you have to make sure you get the correct “glue” (one is for pvc, one for cpvc, and there is a type that will work on both, which is what we needed since the drain pipe was cpvc and we were connecting to pvc).  Another useful tip is once you have turned off the water to the house, put a bucket under one of the valves and open it up, letting out the water in the pipes.  This will relieve the pressure and avoid a spray-fest.  Unless you are into that sort of thing.

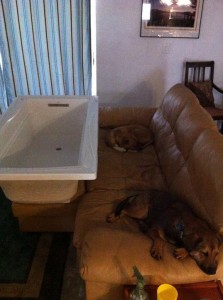
We had already purchased the tub at this point, and it was sitting in our garage.  I dubbed her Bertha because she was very white, very wide, and sometimes enjoyed lounging on the couch with her furry friends:

We carried Bertha in and out of this bathroom no less than 15 times to set her in place and determine the location of the drain.  Bertha was surprisingly light the first time, and surprisingly heavy the last time.  She definitely gained weight.

The moving of the drain took exceptionally long because (1) we had no idea what we were doing; and (2) Miguel travels a lot, for reasons unknown to me.  Some of the progress was made by doing some plumbing, and texting a picture to Miguel for approval.  I don’t recommend it, but hey, it worked for us.  The real challenge was getting the drain in precisely the right spot, and at precisely the right height.  We had to be sure it was perfect because once we cemented that baby in, we were stuck.  The Boy built the tub frame, seen here:

We did not secure the frame in place until after the drain was moved, because we kept having to move it out of the way to work.  A typical “workday” consisted of moving the frame in, bringing Bertha in, setting her in place, laying on the ground looking underneath Bertha, thinking, hmmmm-ing, drawing on the cement with a marker, moving Bertha to the couch, moving the frame, discussing how we would tackle the project.  A few diagrams were drawn, some disagreement ensued, and suddenly it was lunchtime.  After a few “workdays” like this, The Boy was finally satisfied enough to start cutting pipes and reconnecting them.  I wish I could say we got it right the first time, but we did not.  A dry fit of Bertha revealed that we were slightly off.  So a few adjustments later, and we finally had a drain successfully moved, and in the correct place, at the correct height.  With fingers crossed, we mixed and poured some cement:

I don’t know about you, but I am exhausted just reliving that.

Desk, and Other Inanimate Friends

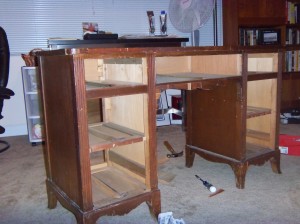
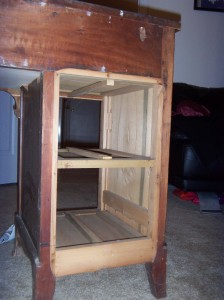
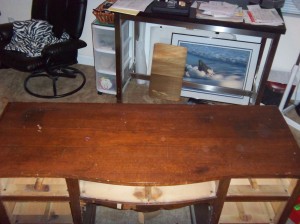
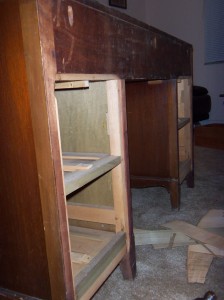
My first big furniture project was a Federal style desk I found on my number one source for all dilapidated furniture:  Craigslist!  The truth is that Desk (see my tendency to name furniture here) looked MUCH better in the picture than in person, I had yet to understand the limitations of veneer, and once I showed up with cash in hand, I felt obligated to buy the darn thing.  She was rough (her drawers existed, but had been removed before this picture):

My original intention was to just refinish the wood (strip, sand, re-stain). However, once I got Desk home, I entertained delusions of re-doing the veneer on the top, where it was the worst.  After I gouged the crap out of the top while trying to remove the old veneer, I decided to paint Desk instead.

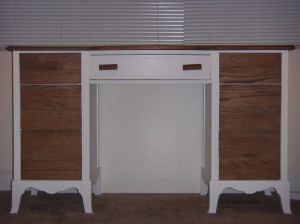
I could not use the old top, so I had to improvise.  I found fairly inexpensive strips of red oak at Home Depot, and used these to make a top surface for Desk.  I spent many evenings in the back bedroom and garage, using dowels, clamps, and wood glue to create one solid board.  Then, I sanded it for hours to get all of the pieces level.  This job is usually done in 15 seconds using a planer, but since I didn’t have a planer, I listened to music and sanded my little heart out.  Finally, The Boy used a router to make neat beveled edges all the way around (I am a little spastic with a router, and didn’t trust my skills – yet).

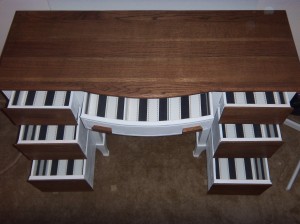
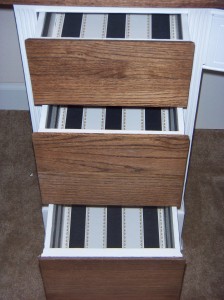
I used the same wood to make new drawer fronts.  I sanded the base of Desk, just to scuff it up a bit, and then applied 2 (or 3) coats of paint with primer.  I like to put a little personal touch, and add a little pizzazz, so I used wallpaper to line the drawers.  The final touch was making drawer pulls for the big center drawer, to bring everything together.  Here is Desk, in all of her glory:

The Boy decreed that I could not start on my next furniture project until I sold Desk (“there is no room at the Inn!”).  So I listed her on Craigslist, and crossed my fingers that she would find a good home.  And she did!! The very sweet girl who took Desk home promised to love her forever. Although I often think of the good times Desk and I had, letting go meant finding my next love.  It is a vicious cycle.  Sigh.

 (PSST – I entered this project in a DIY contest at Not Just A Housewife – check it out!)

Take Out Food

We had very ambitious plans for our new kitchen.  In hindsight, hilariously ambitious. We bought our house on June 30th, and wanted to finish the kitchen before we had to move in on August 1st.  On DIY shows, they renovate an entire room in 3 days (allegedly).  We could do it in a whole month, right?  While working full-time, doing everything ourselves, and moving, right?  RIGHT??

In short, no.  No we could not.  The (somewhat) good news is that a lot of the delay was out of our control.

On August 24th, we started laying tile.  You might be thinking, “wait, I thought they had to move in on August 1st?”  You would be correct.  Let me give you a run-down of the first few days in the house.  First, all of our furniture was located in the garage and on the back patio, stacked on top of each other.  Second, we had guys coming in to texture the ceiling, which is a very messy endeavor, and one of the few things we did not attempt ourselves.  (I am still high-fiving myself for that decision).  So for several mornings, The Boy and I had to wake up early, take a shower, climb over obstacles in the garage (wearing only a towel, which has a mind of its own) trying to find my undies, get dressed, move the bed and a few boxes to the center of the room, cover it with plastic, and leave for the day.  I have never been more happy to go to work.  Oh, and one morning the workers arrived “early”  (5:00 a.m. is not early to me – it is illegal), because the house looked so uninhabitable that they did not realize we were living there.  Good times.  I will stop the complain train there.

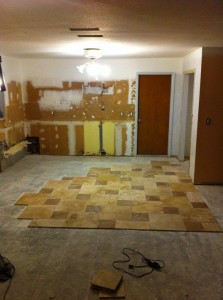
Back to August 24th.  We laid tile in the kitchen in a hopscotch pattern:

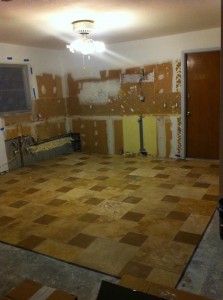
Most people would start in the corner and work their way out, but The Boy thought ahead a little bit (which is very similar to his Controlled Demo strategizing).  Base cabinets would be around the wall’s perimeter, therefore the noticeable tiles would be where they would transition with whatever floor went in the rest of the house, therefore we wanted to start with full tiles there.  Here are the floors finished and grouted:

This was our very first adventure in tiling.  We took a how-to class at our local Floor & Decor, which was very helpful, but you can really only learn this task by doing it.  The mistake we made was mixing too much thinset at one time and being under the impression that it would dry much faster than it actually does.  We worked like maniacs at warp speed, and as a result, there are many tiles that are not perfectly level.  The lesson learned is to take your time, and do what it takes to get them all level.  I have made peace with it.  The Boy sits on the couch staring into the kitchen and growls on occasion.  He will get over it eventually.

We ordered cabinets, which were supposed to arrive in two weeks. After FOUR weeks of calling and emailing (they were “held up” in customs at the Port of Miami – uh huh), they finally arrived:

If that looks like fun, you are a sadist and need help.  We started assembling these babies in early September, and soon had this:

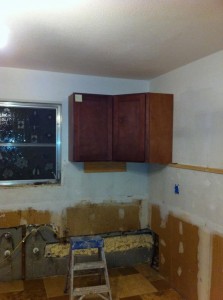
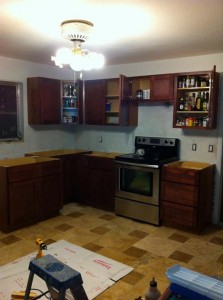
I put sticky notes on each cabinet as we assembled them so I could keep track of where they went.  It is much easier to hang the upper cabinets first, so that you aren’t leaning over the lower cabinets trying to screw in the uppers.  Eventually we had this:

We actually took this photo as evidence of the fact that we had items in the cabinets, in case they fell off of the walls while we slept.  The Boy and I were both legitimately concerned about this, and made a pact to stay in bed if we heard a large crash in the middle of the night.  True story.

On September 26th, we placed our granite order, which was supposed to arrive in – you guessed it – 2 weeks.  As we waited, we replaced the wobbly ceiling fan with a hanging light over the island (that’s right – we added an island!), and had the bracket for the microwave up.  At this point, the granite was several weeks late.  Shocking!

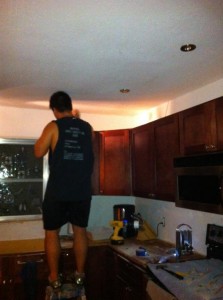
While we waited for the countertops to arrive, The Boy showed off his amateur electrician skills, and installed four recessed lights:

While we continued to wait for the countertops to arrive, we built a fence in one day, with the incredible help and instruction from one of my closest friends, Jessica:

November 29th was the countertop installation day (estimated time:  2 weeks; actual time:  2 MONTHS).  FYI, granite installers do not take kindly to death threats.  Here is the magic:

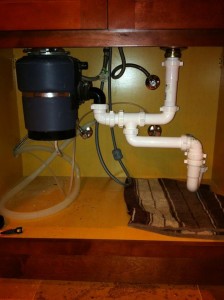
On December 1st, we were able to plumb the sink.  It was the worst game of Legos imaginable, and including the dishwasher, garbage disposal, and water line to the fridge, it was quite a challenge:

It is beautiful, and only leaks if you fill the right side with water.  (Update:  The Boy fixed it!)

We also finally tackled replacing that beautiful Monet-esque stained glass window.  Really, it was beautiful, it just did not fit with our decor (sarcasm font).  Unfortunately, I do not have any photos of that day, which is probably for the best.  The Boy does not like to hear the words, “I told you so,” but sometimes they simply must be said.  I will leave it at that.

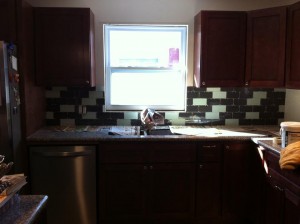
Finally, miraculously, and with not one materialman, Boy, or Girl harmed, we were able to begin the finishing touches:  a much-debated, pinned, and mulled-over backsplash.  I almost contacted the Gallop people to launch a nationwide poll.  It was a tough call, with infinite options, but I am very happy with the results. Here is prep work, to protect our new baby granite from getting hurt:

We used mastic, which is much easier to work with, comes pre-mixed, and is perfect for tiling on walls.  You simply spread that on with a trowel, and use the notched side at a 45 degree angle to scrape it, and then press the tile on.  Here is a progression:

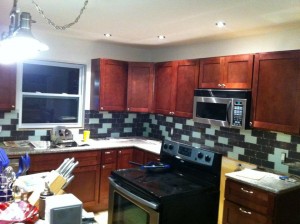
The backsplash was finally grouted, and on February 5th (of the following YEAR), we had our “ta-dah!” moment:

Here is the before/after for comparison (CLICK TO ENLARGE!):

I love it.  Absolutely LOVE it.  I was so happy to have The Boy cook again (that’s right, ladies, The Boy also cooks!).  I’d like to give an honorable mention to the grill, propane tanks, The Boy, and the utility sink in the garage for their hard work during this long ordeal.  It was all worth it.  For those keeping score at home, our one month project actually took over 5 months to complete, from laying floors to Ta Dah.  However, if you count from our original goal, to actual completion, it took us 6 months, which is 5 months longer than expected.  I honestly went into it thinking we would come pretty close to our goal.  So I guess the lesson is, when renovating on your own and working full-time, don’t think.

You know what I mean.

(Psst – you can check out the budget breakdown for this renovation here!)

I also entered this project in a DIY contest at Not Just a Housewife – check it out!