Pinbusters – Photo Transfer to Canvas

Have you ever wondered if the stuff people post on Pinterest is true? Well I have, and I test them all so that you don’t have to, ’cause ain’t nobody got time for that.  Click here to check out all of the pins I haven taken on. You might be surprised by some of the results!

I am back with another riveting episode of Pinbusters.  The Boy and I have vowed to DIY as many Christmas gifts as possible this year.  The goal is not necessarily to save money, since we will still have to buy supplies, but to give more meaningful and thoughtful gifts. Therefore, many of the pins we will be busting are dry runs for Operation DIY Xmas.  If you are a friend, family member, or just plain hoping to be surprised by a gift from us, stop reading.

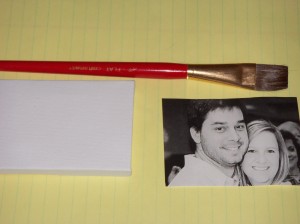
OK, now that we have established that we will not be giving you a gift (you are still reading, aren’t you??), let’s do this.  I was intrigued by the many pins showing various methods for transferring a photo printed on plain ole computer paper to canvas.  I had a tiny little spare canvas left over from a prior project, so I thought it would be perfect for this test.  I browsed my Facebook photos, picked a cute one, and printed it out on my laser jet printer (many of the sites say to print using laser jet, but I have no idea if it is a requirement, and an ink jet won’t work … another test for another day, I suppose!).  Here are the supplies needed:

First step:  Coat canvas with the highly acclaimed miracle craft material – Mod Podge! (Isn’t this just gel medium? No? What am I missing here?)

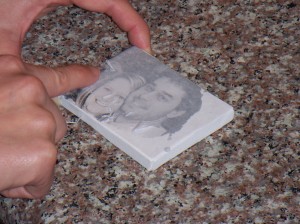
Place photograph, image side down, on the canvas.  Push down and rub the paper all over to ensure good contact and adhesion.  This was easy for me since my canvas was so tiny, but on a larger canvas people recommend using a tool of some sort.  Also, you could paint the canvas prior to this step if you want.

Let dry for several hours.  I let it dry for about 24 hours, just because I was busy, but I am sure overnight would be more than sufficient.  I then used the spray bottle (a/k/a The Dog’s worst enemy and “Bad Girl!” deterrent mechanism.  Seriously, she hates this thing, and it is the only “punishment” that works on her.  I once used it to spray down The Boy’s hair during an at-home haircut, and she must have been reeling at how bad he had been to deserve such treatment) … where was I?

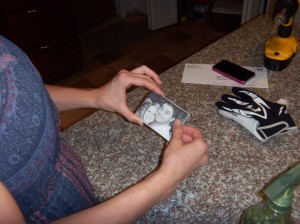
Oh yes, spray the paper.  I had it on jet instead of mist, so I got it really damp, but it didn’t seem to matter.  Then I started rubbing until the paper started peeling and rolling off.  It wasn’t very difficult, and the results were pretty awesome.  I was pleasantly surprised!

So cute!

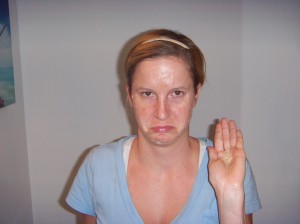
The Boy said we both had double chins in the picture. This is my “retract your statement immediately or die” face.

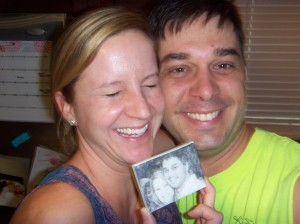
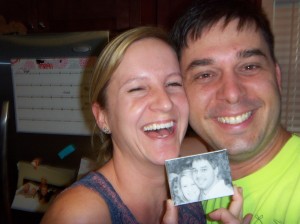
We then attempted to take a photo of us, with the canvas held up to our faces.  I tried first, and then The Boy took over, furiously snapping photos like a paparazzi, but we both failed miserably, and here is the series of photos that resulted:

Take 1.

Take 2.

Take 3.

Take 4.

Take 5.

Take 6. Yikes.

Enjoy, ya’ll.

Pinbusters – Homemade Biore Strips

Have you ever wondered if the stuff people post on Pinterest is true? Well I have, and I test them all so that you don’t have to, ’cause ain’t nobody got time for that.  Click here to check out all of the pins I haven taken on. You might be surprised by some of the results!

This Pin claims that you can make a facial mask from gelatin and milk, that when peeled off, works like a Biore strip.  The first step is buying unflavored gelatin.  I don’t know about you, but I had NO idea this product existed.  It opens up a whole new world of jello (shot) possibilities!  So even if this miraculously cheap faux-Biore doesn’t work, at least I have that.

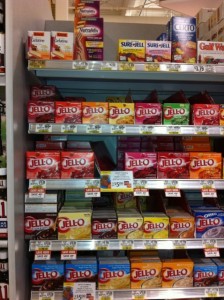
Here is where you can find said unflavored gelatin – hanging out with his flavored friends:

Psst! I’m up here! Top left!

Can you see that price?  $1.49 per package, so I bought two just in case.  Not for homemade Jello shots, Mom!  (OMG imagine the flavor possibilities.  I am going to use Crystal Light packages – sugar free Jello shots!!!  Update:  The Boy pointed at that sugar-free Jello already exists.  Hmmm.  Good point.)

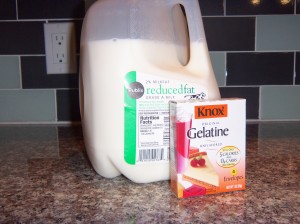
I gathered my ingredients, and it cannot get much simpler:

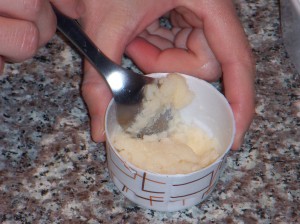
The instructions say to use a disposable container, so I cut off the top half of a cup.  When I opened the box – surprise! – there are four separate pouches of gelatin in there, and with two boxes, we now have quite a surplus of unflavored gelatin.  One pouch is one tablespoon, so you actually don’t need to measure it.  I mixed in 1.5 tablespoons of milk (why not water?) until I achieved this chunky paste, which happened really quickly:

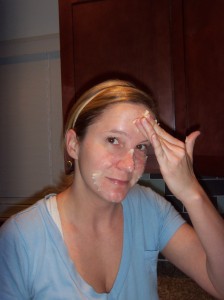
I then, um, squished it all over my face.

Do I look pretty yet?

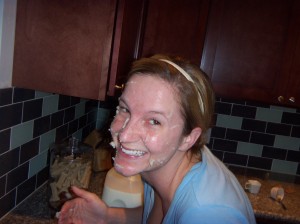
It doesn’t necessarily “spread” like a lotion, so I quickly moved over to the sink to catch the falling gelatin chunks.  The Boy was having quite a good laugh at my expense as he played photographer.  If nothing else, it was funny:

How about now?

I am currently sitting on the couch typing this and in the time it has taken (17 minutes), my face feels like it might shatter.  It certainly feels like a Biore strip on my entire face, despite the large hilarious chunks.  Here goes nothing.

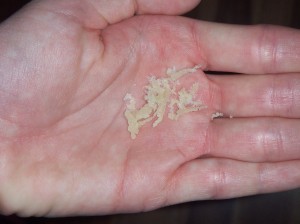
WOW.  Well.  I am not sure where to begin.  First, ouch.  It hurts, but you can’t rip it off all at once like a real strip.  Instead, it comes off in infuriatingly small chunks. One. Chunk. At. A. Time. Hypothetically, IF you could get a good portion to peel off all at once, you MIGHT have the desired effect.  Instead, I picked and peeled for 8.5 minutes and ended up with this:

and this:

When I finally gave up, after giving it the good old college try, I went to wash it off.  The gelatin laughed at water.  It scoffed at my face soap.  I finally had to get a washcloth, soak it with hot water, and SCRUB my face.  More ouch.

I can’t decide if there was something wrong with my recipe and technique, or if the blogger who wrote that post is laughing hysterically and cheers-ing her girlfriends while they revel in the fantastic trick they just pulled on all of the Pin-iverse.  Update:  I just peeled a chunk off the back of my hand and my t-shirt.

Review:  It you rub gelatin all over your face, you will end up with nothing but shame, disappointment, a red face, and if you are lucky, a Dirty dog that licks the leftover gelatin off while a Boy makes you pizza rolls to cheer you up.  There is a very good reason why Biore has the corner on this market.  Don’t ever question it again.  Cut coupons for your Biore strips and be grateful that they exist.  Or have clogged pores!! Really either option is better than what I just endured.  I fully expect to wake up tomorrow morning broken out in a facial rash due to a previously unknown allergy to gelatin.  That would be just my luck.

(I want to go back and change the title of this post to “Ouch, Ouch, You’re on My Face,” but I worry that would be a spoiler.)

This PIN is SO BUSTED, but at least I can experiment with Jello shots.  And for that I thank you, Bill Cosby.

(P.S. I attempted this a second time, with a slightly different technique here – check it out!)

Pinbusters – In Hot Water

Have you ever wondered if the stuff people post on Pinterest is true? Well I have, and I test them all so that you don’t have to, ’cause ain’t nobody got time for that.  Click here to check out all of the pins I haven taken on. You might be surprised by some of the results!

Surely everyone has seen the Pin – “to avoid a pot from boiling over, just put a wooden spoon on top!”  I was cooking pasta the other night, and decided to try it.  I’ll be darned if it didn’t work like a charm!

A charm.

I let that baby boil for several minutes, even got ballsy enough to leave the room, and it never boiled over.  While I am amazed, and pleasantly surprised, I MUST KNOW WHY!!!!  The very best explanation I found is located here:

http://boiledpizza.blogspot.com/2010/03/bps-science-boiling-water-and-wooden.html

Pretty cool, huh?