We watch a lot of DIY television. A LOT. It is the source of most of our “knowledge.” In fact, we applied to be on Renovation Realities, but our application was rejected because we were “too experienced.” We LOLed at this pronouncement, and wished we had applied sooner, when there were holes in our ceiling and the kitchen cabinets came flat-shipped in little boxes and the nice guy at Home Depot chuckled at our questions and we stood and stared at things more than we actually worked.
I have a different theory as to why we were not selected. The Boy prefers what he calls “controlled demo,” and he admitted as much on our video application. I think this is an oxymoron and the two words should never meet in a dark alley, let alone in the same sentence. Controlled demo involves a lot of looking, thinking, strategizing, plotting, gesturing, speaking in tongues, Google Sketch Up-ing, planning, and me eventually taking a nap. Riveting television. Those producers are no dummies.
I want to break sh*t, and I want to do it now. That is what the discerning DIY fan wants to see. Therefore, I am going to apologize in advance that I do not have a video of me throwing a hammer through a wall. What I am going to show you is a progression of photographs documenting the careful removal of two walls, all of the tile in the house, and everything in the kitchen (including the bulkheads). (yawn)
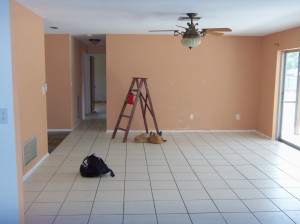
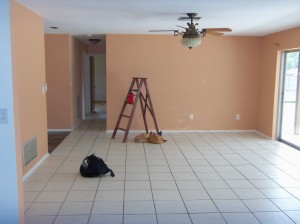
This wall on the left, which forms a very unnecessary hallway from the entry to the kitchen, is completely unaware that The Boy is plotting its demise:
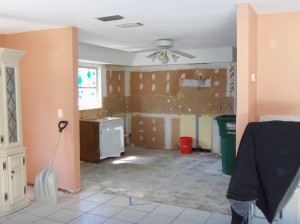
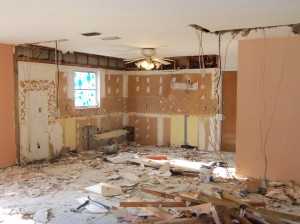
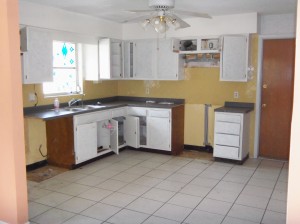
This wall on the left is also slated for removal, and the picture shows the progress of kitchen demo:
Here is The Boy (clothed!!) working on the tile:
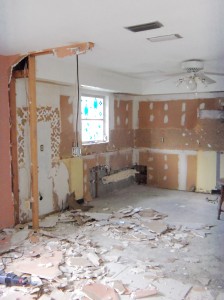
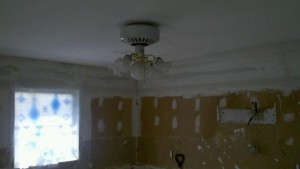
You can see in this picture that we had one light switch to relocate (that thing hanging from the ceiling):
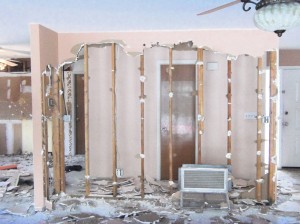
The other wall contained several outlets, the AC control, an air return, and an unidentifiable tiny wire that we later determined to be – wait for it – a LAND LINE. Yes, a telephone line. This house is SO OLD:
Final shot showing both walls gone, and the bulkheads!
We did all of this work (including cleanup) in the span of one weekend. The following week, every day after work, we came over and moved everything that was dangling, and re-routed the air return. (We lived in a house we were renting for a month after closing, to give ourselves time to “finish the kitchen” before we moved in. Hah. More on that debacle here.)
Ah, yes. The air return. It was our first “what the heck do we do with that??” moment. I went on my lunch break to an HVAC supply warehouse, where they had apparently never seen a woman, let alone a woman in a suit and heels, shopping for HVAC supplies. The guys were great. I explained what I was trying to do, and I got a full-on demonstration on the floor of the warehouse. Never underestimate the power of boobs asking nicely!
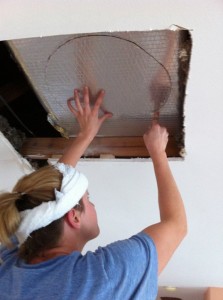
Here I am cutting into the return duct:
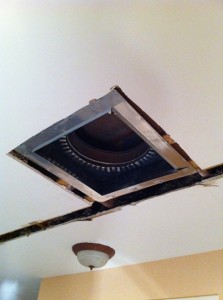
Next I had to slide this “collar” into the hole I had made, and press down little metal tabs on the outside of the duct to keep the collar in place. I then climbed into the attic (thus the sweet headband), to tape the junctions so they would be energy efficient and not leak air. There was a metal box we had to affix to the ceiling, which would hold the cover, but to secure it in place we had to attach short lengths of 2 x 4’s to the existing joists. Finally, we had this mostly finished product:
Beautiful, isn’t it??? I was in love. Love hurts, though, and I had to improvise a bandaid out of a napkin and electrical tape:
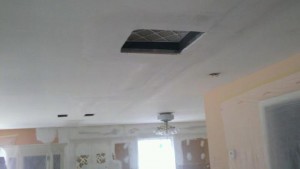
We finished this in the nick of time on a Sunday night, since we had drywall guys coming to work their magic the next morning. Here is their handiwork:
And a shot of the missing bulkheads:
The white tile in the entire house (literally everywhere, except 2 out of 3 bedrooms) was ugly, poorly done, and had to go. After removing all of the kitchen and entryway tile by hand (bent over, crowbar in one hand, hammer in the other, like our relatives – the early upright homo sapiens), we decided to embrace the 21st century and rent a demo hammer. While I am a huge fan of Home Depot, and shop there weekly, I found their tool rental rates and policies to be steep. I shopped around and found a small local shop, THG Rentals, that had very liberal timeframes and much lower prices. The employees were very nice too, and made this fun little weekend possible:
Two long, sweaty, 10 hour days later, we had very classy concrete floors in most of the house (which, by the way, we still mostly have). We rented a Bagster for the first time, and it was perfect for this job. You just buy the bag at Home Depot, Lowes, etc., put it in an accessible place in the driveway, and fill it to the top. Then you call your local waste removal (ours is a private company since we are in an unincorporated area), and they charge you to pick it up. Our total cost was just under $150, which is much cheaper than renting a real dumpster.
So there you have it. Demolition with The Boy. Bonus points if you made it through this entire post without nodding off. Next up is an in-depth look at the kitchen, from tile to cabinets to lighting!

